Vivitar DVR650 Bedienungsanleitung
Stöbern Sie online oder laden Sie Bedienungsanleitung nach Kamerarekorder Vivitar DVR650 herunter. Vivitar DVR650 User manual Benutzerhandbuch
- Seite / 65
- Inhaltsverzeichnis
- FEHLERBEHEBUNG
- LESEZEICHEN
- DVR 940HD 1
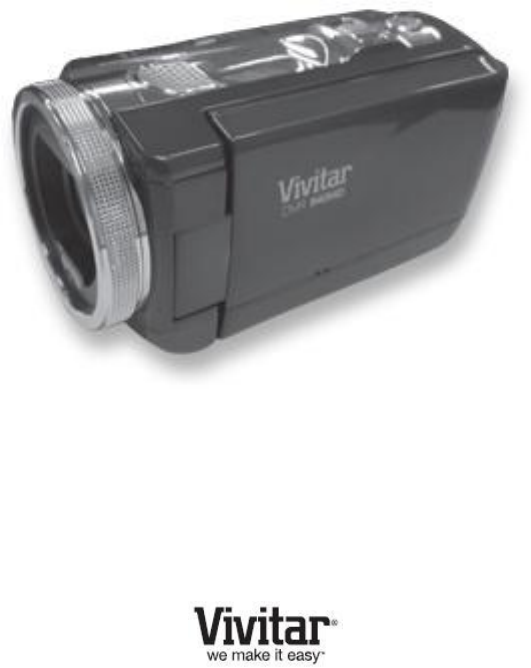
- Digital Video Camera 1
- Contents 2
- Introduction 3
- What’s Included 3
- Initial Setup 5
- the Digital Video Camera ON 6
- Setting the Date and Time 7
- Technical Specifications 10
- Changing Camera Mode 12
- Navigating the Menus 13
- Video Capture Mode 14
- Video Capture Mode Menus 16
- Scene Menu 17
- Image Size Menu 17
- Image Quality Menu 18
- Anti-Shake Menu 18
- White Balance Menu 19
- Color Effect Menu 19
- Image Sharpness Menu 20
- Light Exposure Menu 20
- ISO Menu 21
- Metering Menu 22
- Language Menu 23
- Date/Time Menu 23
- Audio Menu 24
- Auto Power Off Menu 25
- Frequency Menu 26
- TV Mode Menu 26
- Format Memory Menu 27
- Video Playback Mode 29
- Video Playback Mode Menus 30
- ViviLink Menu 31
- Protect/Lock Menu 31
- Delete Menu 32
- Photo Capture Mode 33
- Photo Capture Mode Menus 35
- Image Resolution Menu 36
- Self-Timer Menu 37
- Face Detect Menu 39
- Smile Capture Menu 40
- Multi SnapShots Menu 42
- Silent Mode Menu 47
- Photo Playback Mode 51
- Photo Playback Mode Menus 53
- Rotate Menu 54
- Crop Image Menu 54
- Print Photos Menu 56
- Slide Show Menu 57
- Installing the Software 59
- Get started! 62
- Transferring Images Manually 63
- Camera Maintenance 63
- Sakar Warranty Card 64
- Technical Support 65
- Troubleshooting 65
Inhaltsverzeichnis
DVR 940HD Digital Video Camera User Manual © 2010 Sakar International, Inc. All rights reserved. Windows and the Windows logo are registe
10 Technical Specifications Image Sensor CMOS Sensor Image Resolution 3264x2448(8MP)4:3, 3648x2048 (7MP) 16:9 HD, 2592x1944 (5MP) 4:3,
11 Computer System Requirements - WINDOWS OS To be able to download photos and videos to your PC, you will need the following minimum configuration:
12 Powering ON/OFF Your Digital Video Camera Make sure the lithium battery has been charged and properly inserted into your digital video camera.
13 To change the active digital video camera mode, make sure the camera is powered ON and press the MODE button. When in Video Capture Mode, this
14 Video Capture Mode The Video Capture Mode allows you to capture videos with your digital video camera. When the digital video camera is first pow
15 ViviLink Button: The ViviLink button (located on the inside wall of your digital video camera) allows you to easily and quickly define which soc
16 Video Capture Mode Menus The following are the menus that appear in your digital video camera‟s Video Capture Mode:
17 Scene Menu The Scene Menu allows you to choose scene settings that allow your camera to adapt properly to your current environment. 1. Press
18 9. Remember that this setting will be saved by your digital video camera until you manually change the setting or restore the camera‟s default fa
19 5. A selected option icon will appear on the selected item. 6. Press the joystick button LEFT or RIGHT to select the next menu item. 7.
2 Contents Introduction ...
20 2. Press the joystick button LEFT or RIGHT to scroll and select the Color Effect menu. 3. Press the joystick button UP or DOWN to highlight th
21 When the environment has more light than is needed, reduce the exposure setting (by using the negative - count) to reduce the amount of light all
22 3. Press the joystick button UP or DOWN to highlight the desired menu option. 4. Press the OK button on the joystick to select and confirm the
23 7. Press the MODE button to exit the menu and return to your previous mode. 8. An icon reflecting your selection will display on the LCD screen.
24 To Enable/Disable the Timestamp: 1. Press the MENU button to open the menus for the current mode. 2. Press the joystick button LEFT or RIGH
25 2. Press the joystick button LEFT or RIGHT to scroll and select the Audio menu. 3. Press the joystick button UP or DOWN to highlight the desir
26 Frequency Menu The options in the Frequency menu represent the frequency of the electrical current in fluorescent lighting sources in your local
27 6. Press the joystick button LEFT or RIGHT to select the next menu item. 7. Press the MODE button to exit the menu and return to your previous
28 Firmware Settings (Restore Factory Settings) Menu Use this menu to view the Firmware version on your digital video camera or to reset your camer
29 Video Playback Mode When you first turn on the digital video camera, the camera will be in Video Capture mode by default. Press the MODE button tw
3 Introduction Thank you for purchasing this digital video camera. Everything you need to take quality digital videos and photos is included with you
30 3. Press the OK button on the joystick to enlarge the selected image full size. 4. Once the video is full size you can play and view the video.
31 ViviLink Menu The ViviLink technology allows you to quickly and easily upload your camera‟s photos and videos to the social networks of your cho
32 8. Any image that is locked will display a lock symbol on the LCD screen when viewing that image in the Playback mode. Videos that are not locked
33 Photo Capture Mode The Photo Capture mode allows you to capture pictures with your digital video camera. Taking a Picture 1. While in Photo
34 ViviLink Button: The ViviLink button (located on the inside wall of your digital video camera) allows you to easily and quickly define which soc
35 Photo Capture Mode Menus The following are the menus that appear in your digital video camera‟s Photo Capture Mode:
36 Scene Menu The Scene Menu allows you to choose scene settings that allow your camera to adapt properly to your current environment. 1. Press
37 9. Remember that this setting will be saved by your digital video camera until you manually change the setting or restore the camera‟s default fa
38 Beeping sounds will indicate the countdown until the photo is taken - according to the time you have selected: 2 seconds, 5 seconds, or 10 seconds
39 9. Remember that this setting will be saved by your digital video camera until you manually change the setting or restore the camera‟s default fa
4 Parts of the Digital Video Camera 1. Power Button 13. Delete / Right Button 2. Photo Shutter Button 14. EV- / Down Button 3. Vide
40 9. Remember that this setting will be saved by your digital video camera until you manually change the setting or restore the camera‟s default fa
41 White Balance Menu The White Balance feature allows your camera to adjust the coloring of the captured images depending on the type of light sou
42 Multi SnapShots Menu When enabled, the Multi SnapShots feature allows you to take five rapid snapshots in a row with a single click of the Photo
43 9. Remember that this setting will be saved by your digital video camera until you manually change the setting or restore the camera‟s default fa
44 ISO Menu The ISO menu allows you to set the level of sensitivity that your camera has to light in the surrounding environment. When the ISO leve
45 Spot – Meters the area within the spot point frame at the center of the LCD to set the exposure on the subject in the center of the monitor. 1.
46 Date/Time Menu When you capture an image with your camera, the image will include a time stamp with the date and time that the image was taken.
47 6. If you would like to exit the Date/Time menu without changing the settings, press the MODE button at any time to exit the menu and return to y
48 2. Press the joystick button LEFT or RIGHT to scroll and select the Auto Power Off menu. 3. Press the joystick button UP or DOWN to highlight
49 TV Mode Menu TV Mode allows you to select the TV option appropriate for you to view your captured images on your television. See “Connecting the
5 Initial Setup Installing the Battery Installing the Memory Card To Charge the Battery: Insert the battery (as shown above). Power Off the
50 4. To Format the Memory Card: If you would like to proceed with the format, select „Yes‟ and press the OK button on the joystick to confirm.
51 Note: Selecting the system Language is required after resetting to the Factory settings. After you have RESET to the Factory Default Settings, and
52 1. Press the W/Zoom Out button. All the images on your camera will appear in the Thumbnail View. 2. Use the UP / DOWN / LEFT / RIGHT buttons on
53 Photo Playback Mode Menus The following menus appear in your digital video camera‟s Photo Playback Mode: Note: The order of the menus options m
54 Changing the ViviLink destination site will also make the selected site the new default ViviLink option. A new default can be selected at any time
55 Protect/Lock Menu Pictures and Videos taken with your camera can be protected or “locked” to prevent any deletion or alteration being made to th
56 5. To delete all the videos and photos you have saved on your SD Memory card, select “Delete All Images?” and press the OK button on the joystick
57 Slide Show Menu The Slide Show menu allows you to set the interval length of time that each picture will display during the slide show. Note: Wh
58 2. Turn On the TV and the digital video camera, and then set the TV to “AV” mode. 3. Set the TV format on the digital video camera to suit the
59 Installing the Software You must be connected to the internet to install and run the Vivitar Experience Image Manager software. 1. Insert the ins
6 When powering the digital video camera ON for the first time the digital video camera will take you through the initial setup. Powering the Digita
60 Note: If you do not have internet access, you can still download media from the camera. Click the “How to transfer photos and videos from my camer
61 Getting Photos and Videos from your Camera to Your Computer The SD card must be inserted in the digital video camera. Do not disconnect the cabl
62 9. A media download progress bar appears on the bottom left showing the number of media files downloading to your computer. A message appears whe
63 Transferring Images Manually Transferring Images from my Camcorder to my Computer Manually: WINDOWS 1. Use the USB cable that came with your camc
64 Sakar Warranty Card This warranty covers for the original consumer purchaser only and is not transferable. Products that fail to function properly
65 Technical Support For technical support issues please visit our website at www.vivitar.com. You can find manuals, software and FAQ‟s at the websit
7 Setting the Date and Time The next step in the initial camera setup is to set the date and time on the camera. Set the Date
8 Main Digital Video Camera Modes Your digital video camera has different modes for the various functions. You can switch modes by pressing the MOD
9 Playback Mode (Photos & Videos) Use this mode to view and manage the videos and photos on your digital video camera. After turning on your
Weitere Dokumente für Kamerarekorder Vivitar DVR650

Verwandte Produkte und Handbücher für Kamerarekorder Vivitar DVR650
 (40 Seiten)
(188 Seiten)
(40 Seiten)
(188 Seiten)
© 2020, manymanuals.de. Alle Rechte vorbehalten. | 1.591 s |
 Manymanuals.com
 Manymanuals.de
 Manymanuals.fr
 Manymanuals.it
 Manymanuals.pl
 Manymanuals.cz
 Manymanuals.es
 Manymanuals-pt.com
Kommentare zu diesen Handbüchern